I’ve merged in some significant updates to the NanoBLESensors project. Hop over to GitHub to check them out.
Category Archives: Uncategorized
DHT11 Temperature and Humidity Sensor and the Arduino Nano 33 BLE
I’ve created a new simple Arduino sketch using a variety of Temperature/Humidity sensors. https://github.com/tjpetz/EnvironmentSensorTests. Of note in this simple example is using the DHT11 sensor with a Nano 33 BLE Sense board.
Recover Synology rsync backup jobs
I recently upgraded a very old Netgear ReadyNAS device to a new Synology DS-420+ at a remote location.
The main use of the old ReadyNAS was an a rsync target for backing up my main Synology rack station. I have about 2.5TB of rsync’d files. I wanted to reuse the existing rsync files to avoid the several months necessary to build a new backup.
I thought I could just repoint the existing Hyper Backup jobs on the Synology rack station. This did not work as I couldn’t reset the name of the share where the files were to be backed up to. I also tried building new jobs using the targets of the copied files but this would error out because HyperBackup would report that files already existed in the target directories.
To work around these issues what I was able to do was create new rsync single copy backup jobs in HyperBackup with the same source as the existing jobs but pointing to new backup locations. I then started the backup jobs. I then canceled them shortly after they started. Once fully canceled I copied the old rsync files into the new backup locations. I set the file ownership of these files to the same account used to run the rsync. Once I did this I could restart the HyperBackup jobs and they detected the existence of the files. This saved months of rerunning HyperBackup to fully rebuild the backup images.
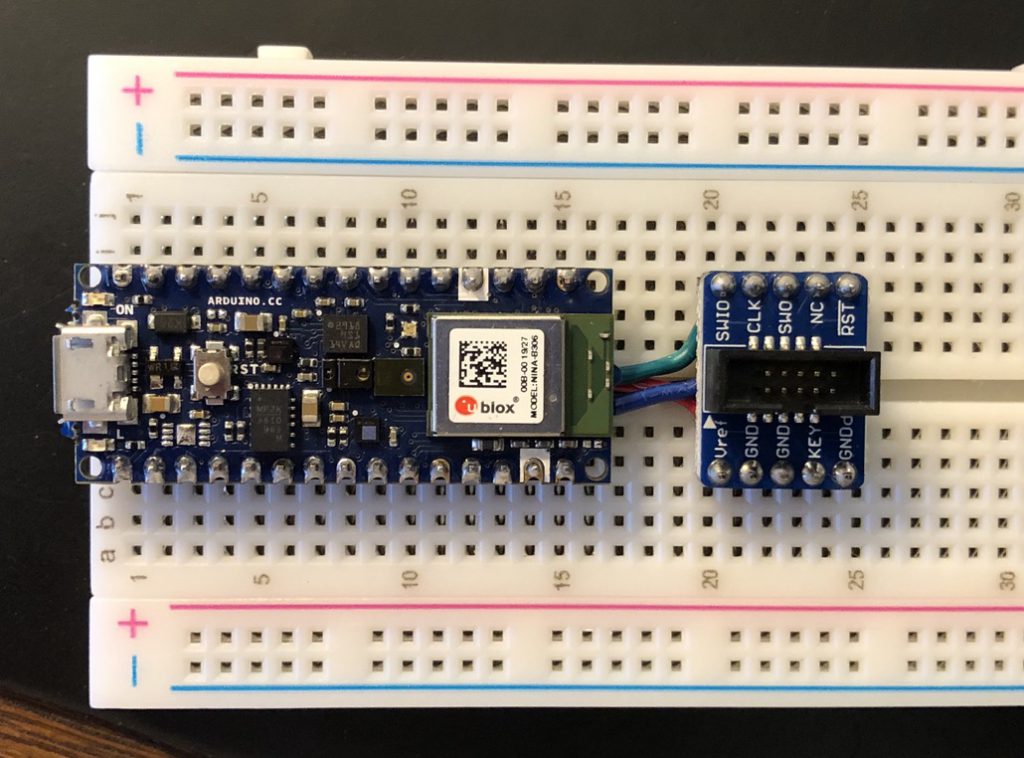
SWD Breakout and Breadboard for Nano 33 BLE Sense
The Arduino Nano 33 BLE (Sense) and the Nano 33 IoT expose SWD pads on the bottom of the board. These pads expose the SWD interface that enable debugging when used with an SWD compatible debugger such as the Segger J-Link Mini EDU (https://www.segger.com/products/debug-probes/j-link/models/j-link-edu-mini/).
The pads on the bottom of the Nanos are very small (and as we’ll see later quite fragile). Normally you would use some form of test fixture and pogo pins to connect to the pads. I don’t have that. Some approaches show soldering dupont wires to the pads and then connecting to the J-Link via and adapter.
I’ve used a solderless breadboard with my Nano 33 BLE Sense and an Adafruit SWD Breakout Board (https://www.adafruit.com/product/2743) to build a debugging and breadboard setup.

The SWD debugging interface needs GND, the 3.3v Reference, SWCLK, SWDIO, and RESETN. All these signals are available on the bottom of the Nano board. To minimize the number of wires to solder I decided to pull SWCLK, SWDIO, and RESETN (turned out to be a bad idea) from the pads.
Step 1 is to solder the wires to the Nano.
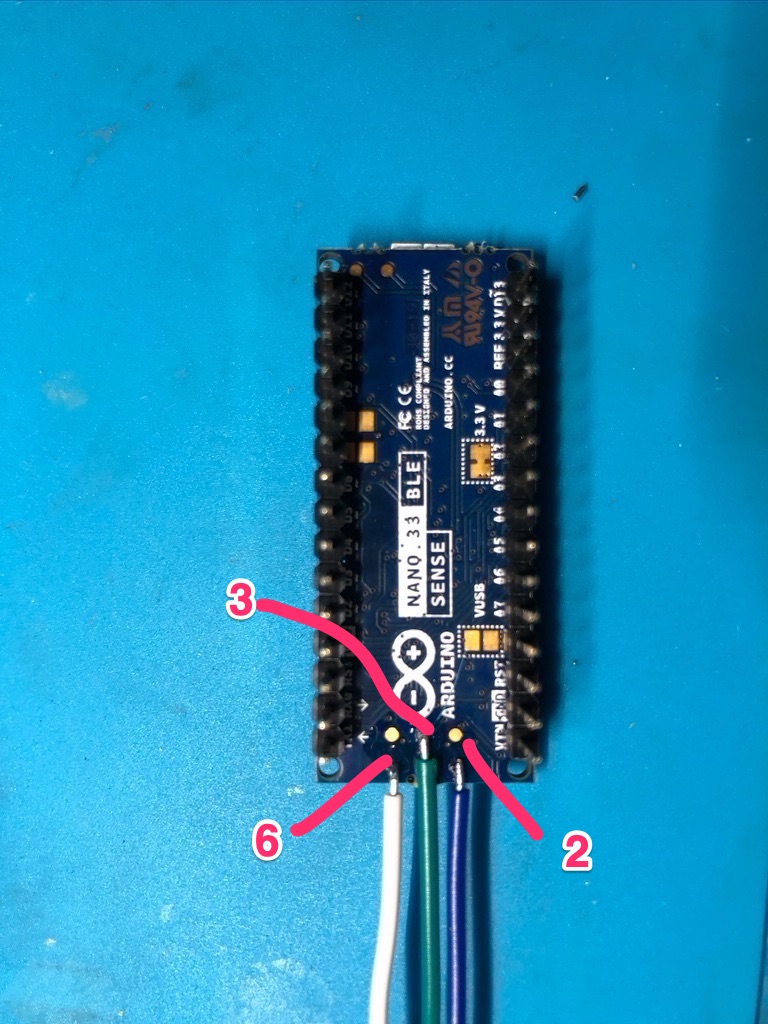
Pin 2 (Blue) = SWDIO
Pin 3 (Green) = SWCLK
Pin 6 (White) = RESETN
Applying some hot glue (should) help keep the wires in place.

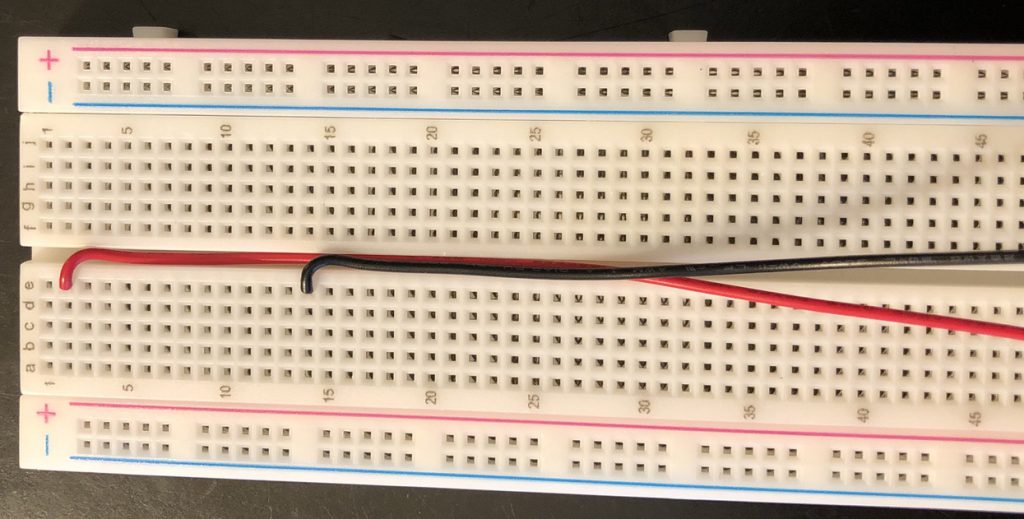
Now we start assembling the solderless breadboard. Here we’ll wire the 3.3 volt reference to Pin 2, pickup ground from Pin 14. We’ll run the wires down the central channel to maintain clearance under the Nano.
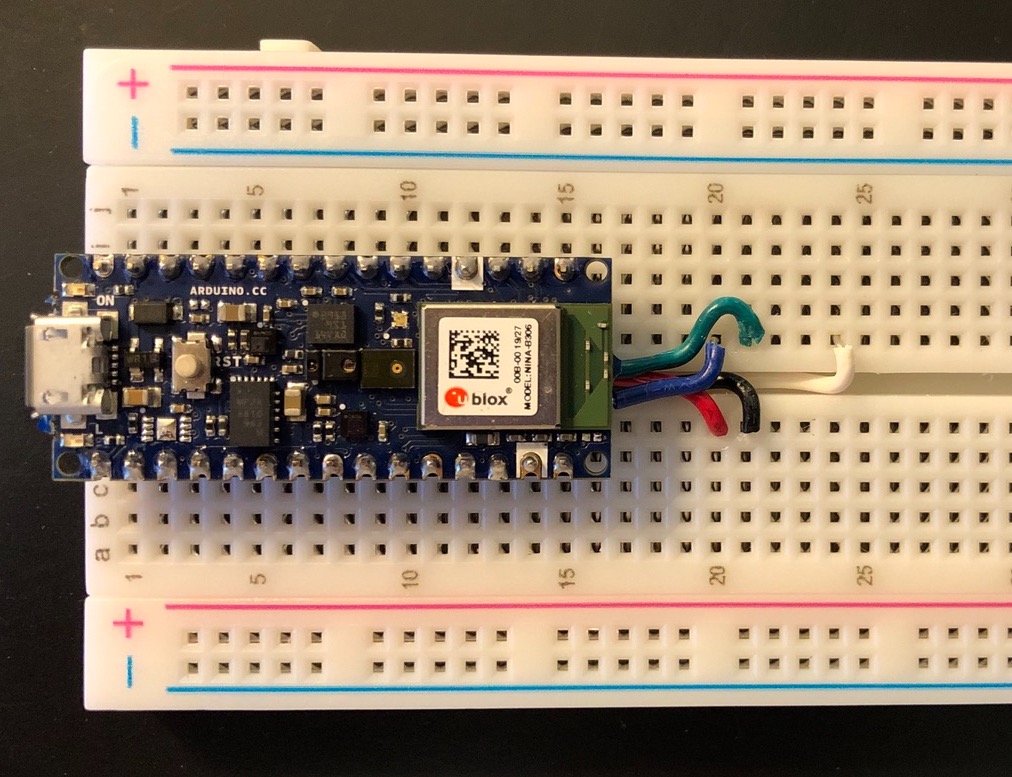
Now we start to layout the board with our wires.
We’ll run the wires so they are neat and go under each board.
While assembling, the White Wire, Pin 6 (RESETN) ripped off the board 😞 A most unhappy moment. I was being very careful while stripping the wire but it must have slipped. Reviewing the board and the photos the hot glue was probably not making sufficient contact with the board over the white wire.
While reviewing videos on repairing PCBs I decided to go double check which wire was ripped off. At that point I realized that it was the RESETN and that signal is also available on Pin 13 of the Nano header. Rather than attempt to repair the board (for which i don’t really have the right tools) I decided to simply take the RESETN signal from the header.

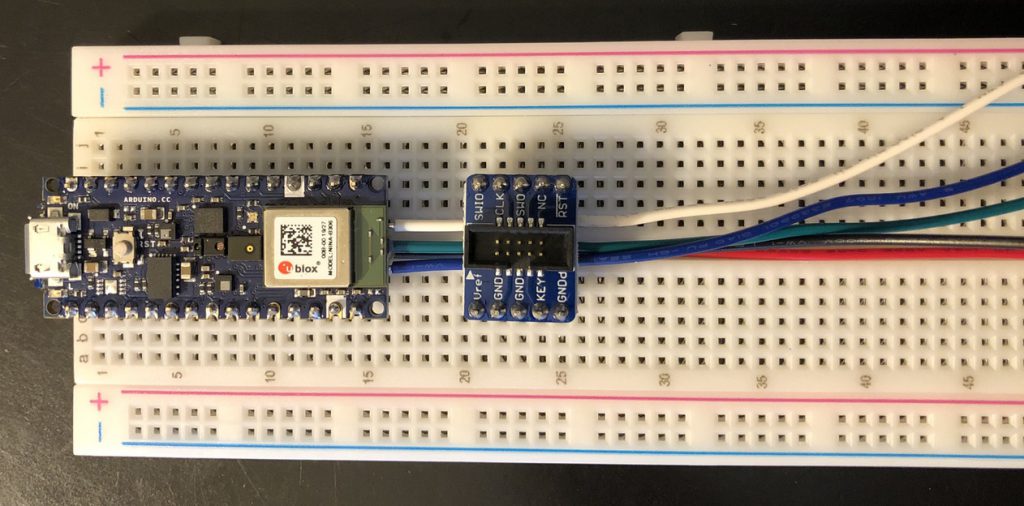
The Nano is then placed on the board the SWCLK and SWDIO are carefully routed to their pins on the breakout board.
The breakout board may now be placed on the breadboard.
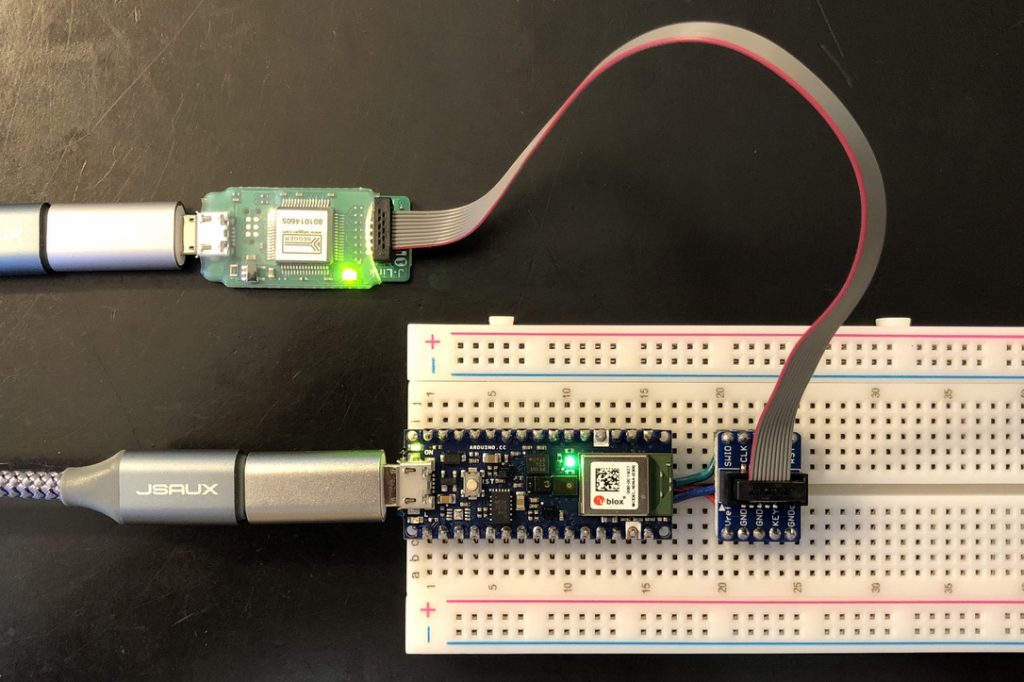
Finally we can now connect the Segger J-Link Mini EDU.
Trouble with Bind9 on a Pi with NFS root
I got a new Raspberry Pi 4 as I’m looking to consolidate some of my old Pi’s and clean up my servers. To avoid issues with wearing out the SD cards I mount the root file system off an NFS NAS storage server.
Unfortunately I’ve hit a problem with installing Bind9 using the defaults when mounting root via NFS. When starting Bind9 I get the error
named[5466]: working directory ‘/var/cache/bind’ is not writable
However, the /var/cache/bind directory is fully writable by the bind account.
Running a few test I verified that the exact same configuration works when the root filesystem is on the SD card. It seems this issue is related to the chroot that the bind9 runs in by default. If I edit /etc/defaults/bind9 and remove “-u bind” from OPTIONS then bind starts. However, its obviously running as root. I’d prefer to have it run as bind.
So far poking around at google hasn’t identified the specific issue. I’m pretty sure it’s somehow related to using chroot on an NFS mounted filesystem.
I’ll post an update if/when I figure out the issue. In the meantime if you hit the same problem you can always run as root 🙁
BLE and WiFi on Nano 33 IoT
I’ve put together a simple demo project of using both the BLE and WiFi radios on an Arduino Nano 33 IoT. Note, as there is only 1 radio you cannot use BLE and WiFi simultaneously. You can use one at a time, the order of how you make the various calls is important. Check it out on GitHub in SetWiFiPoc.
New Arduino Project
I’m working on tracking down and resolving a humidity problem in our home. While I have some basic measurements of humidity through our Nest Thermostat and a Canary device I want broader coverage so I can measure localized problem areas. The relatively new Arduino 33 BLE Sense looks to be a great device to meet my needs.
I’m creating a simple network combining BLE (Bluetooth Low Energy) and WiFi. I’m planning to use an Arduino 33 BLE Sense to measure the environment. the Arduino 33 BLE Sense doesn’t have Wifi. I’m planning to use an Arduino 33 IoT to act as a “gateway”, polling the Sense for measurements and periodically publishing them to an MQTT broker. The MQTT broker will be Mosquitto running on a Raspberry Pi.
I’m planning to use NodeRed to pull the message off MQTT, store them in an Influx db, and then graph the results in Grafina. I plan to do this all in Docker images on a Raspberry Pi.
This project will evolve over time. I will be publishing the code as it evolves over on Git Hub. I plan for this to be a bit of an example of how I incrementally develop systems, therefore I’ll be publishing rather raw and unpolished code in commits on GitHub.
If you’re interested follow along on GitHub at https://github.com/tjpetz/NanoBLESensors